260 Rem With Cast Bullets Part 4

Tips

After your bullets are sized and lubed or powder coated, you will need to prepare your cartridge cases. There are a number of factory options available as of press time. When I first began shooting 260 most of the factory cartridges I could find locally were Federal with the odd box from Remington. Wanting to press more brass into service without buying pre-made ammunition, I even neck sized a few range pick-up 243 Winchester cases. I didn’t find an appreciable difference between brands until I bought 20 cases made by Norma. In addition to being slightly heavier, the necks grew less than other cases and seemed to give more uniform neck tension. Eventually, I picked up 50 cases made by Starline and I intend to make the same purchase when the cases I currently have wear out. I considered Lapua at one time, but that was before Starline began making 260 Rem cases. Bottom line – pick the brand that performs the best for you for the price you’re willing to spend.

A little goes a long way.

To begin prepping the cartridge cases I will start by applying a light film of Hornady Unique lube with my finger tips on the case neck, and running them through a neck sizing die equipped with a decapping pin to punch out the old primer. The lube is easily removed by a soft cloth after sizing. I use all of my 260 loads in one rifle so do not feel the need to full length size. Additionally, cast loads generate less pressure than standard jacketed loads so are less likely to deform the case as much. You may be wondering about whether tumbling the cases prior to sizing is necessary. For me it is not. My cartridges are used in a bolt action rifle and seldom strike anything but relatively clean concrete upon ejection. A simple wipe around the case neck with a soft cloth to remove light powder / lube fouling is all I do for routine cleaning.

A little lube between the thumb and forefinger should last several cases. Be sure to only apply lubricant to the case neck and not the shoulder. For full length sizing, the body should be lubed as well.

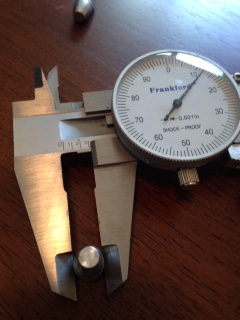
The next step, case trimming, is optional and depends on your specific cases and how many times they have been fired. Most new cases for 260 Rem will be manufactured right around the recommended overall case length of 2.025.” Cases that have been fired several times with cast loads or moderate to strong jacketed loads should be checked for overall length more frequently. Cases exceeding 2.035” in length should be trimmed using a case trimmer or other appropriate device. Chamfering and deburring of case mouths will be necessary after trimming as well to ensure smooth seating of cast bullets.

The next procedures; priming and case mouth expanding, can be accomplished in any order. I prefer to prime the cases first. I do this on a Dillon 550b except I do not rotate the cases to the next station. At this point I’d like to mention primers or the lack thereof. The times we are currently experiencing will pass and large rifle primers will be more abundant. In the mean time, I’ve begun experiencing with large rifle magnum primers in 260 Rem cast loads. I’m down to about 200 standard primers and had a brick of large rifle magnum primers laying around for the past few years. I figured now is as good a time as ever to start testing. While I’m not advocating the practice, I have found no discernable difference switching primers with my cast loads. Then again, I’m operating on the lower end of the pressure scale and its not like these are higher pressure jacketed loads. I want to do more testing and cover my results in a future review.   

Case mouth expansion is performed at station 2 on my Dillon, which is normally reserved for powder charging. Since I prefer to charge 260 loads off the press there’s no loss of press utilization. I settled on Lyman’s M die, which contains a central mandrel that expands the case neck slightly. It also contains a stepped shoulder which aids in placing a concentric bell on the case mouth. I obtained proper adjustment on the die by raising a case in station 2 without the die in place. I then screwed the die in until it contacted the case mouth. By adding quarter and half turns on the mandrel stem, and checking the case for the proper amount of belling, I was able to fine tune the proper amount of belling on the case mouth. The exact amount of belling is debatable, but I stopped when the base of the bullet just beyond the gas check slipped into the case with hand pressure. I’ll admit that I place a bit more bell on my cases than most but I found that a little too much was better than a little too little as it can result in shaving lead. Keeping your cases trimmed to suggested minimum length will also mitigate over belling. You may be wondering if you could bypass this step in the loading process. I used to think the same thing and couldn’t hit paper at 25 yards. Save yourself some headache and get a proper neck expander die.  

And that wraps up Part 4. The next section will cover case charging, bullet seating, and crimping.

260 Rem With Cast Bullets Part 3

Tips

Building upon powder coating bullets, this post will focus on the traditional lubing of cast bullets. Just like with powder coating from part 2, the bullets will need to be checked before sizing and lubing. But without the added bulk of the powder coating I find that the checks slip on easily to the shank of the RCBS 6.5-140 SILH. Because of this I find it easier to slip a check into the sizing die itself.

Once the bullet is set on top of the check inside the sizing die I will gently lower the ram of the RCBS Lubrisizer right before the top punch makes contact with the nose of the bullet. Caution must be exercised to keep the top punch from shaving lead or worse, bending the slim 6.6mm bullet. I find it prudent to use my off hand to stabilize the nose of the bullet while gently lowering the ram until contact is made. After that it’s a simple matter of driving the bullet into the sizing die (I size to .265” for my rifle), giving a gentle crank on the lube reservoir handle, and raising the ram.

At this point I like to inspect my rifle bullets a little closer. This particular bullet has only one lube groove and will be under more pressure, and travel a much longer distance down the barrel than my cast pistol loads. If you are lubing a similar bullet it might be a good idea to ensure the groove is filled. This is less of a concern on bullets with multiple lube grooves.

And while we’re on the subject of lubes, the aspiring caster is faced with a wide variety of commercial and homemade lubes. The reader may also be familiar with lubes to some extent and assume that I’m at least using a rifle lube. Wrong. I had every intention of using a lube rated for rifle velocity but made a happy little mistake and lubed my first successful cast 260 Rem loads with RCBS 80008, a pistol lube which melts at 115 F. That’s hardly a rifle lube but it worked then and it works now. My advice to others is to try lubing with whatever you already have in the reservoir. Anyone who lubes bullets knows it’s a pain to switch lubes when you’ve just put a full stick in the lubrisizer. It may not work but at least you’ll know for sure.

Back to inspecting the bullets. The next item of interest is the gas check itself. Run a finger nail over the seam of the check where it sits against the bullet. If the check was seated smartly there should be no hangups. For any problems, run it through the sizing die again. You will also want to clean any lube which may have smeared on the bottom of the gas check. This has the potential to introduce lubrication into the powder charge. While I’ve never experienced a misfire I could attribute to lube contamination, its still a possibility.

So that’s the gist of traditional sizing and lubrication. Part 4 will cover cartridge case selection and preparation.   

Worth Your Consideration – Walther PPS M2 in 9mm

Reviews

When the seasons change, one surely needs to be ready. And in the spring of 2020 there has been nothing but change. As far as the weather in Georgia is concerned the temperature tends to go from cold to hot. There’s a spring in name but name only. It may very well dip into the 50s at night but you can be sure of 80s during the day in late March when you least expect it. And being a one-gun kinda guy, I set about another season of dressing around the Glock 30SF. Until I didn’t. It became even warmer. I’m not doing this anymore. Thick polos, long sleeve button ups just to provide concealment, jeans to add rigidity to the belt line. Double magazine pouch on the opposite side, the added weight and all while suffocating under the heat. No more.

To keep this from rambling on I made the decision to adopt a two gun system of carry – albeit not at the same time. There would be a warm season gun and a cool season gun. I would let my attire dictate the tool, not the other way around. And because I had already been looking for a while, the Walther PPQ SC was already on the short list as the cool season carry pick. But since it was recently summer and the high temps in my part of the country can stretch into late October, I began with the summer carry option. I gave serious consideration to pistols like the Springfield Hellcat and Sig 365. But in the end it came down to dimensions, most notable being the grip length and form. There were more than a few pistols that fit my overall height requirements (nothing over 4.6”) but not all of them exhibited svelte rounded grips. I eventually clicked away from the PPQ SC long enough to check out the PPS M2. It met the requirements. A big plus was the weight of around 21 ounces and a grip that didn’t resemble a wood plank. After carrying the CZ 75 Compact, I’ve come to appreciate a few more ounces and shapely grips. With a height of 4.4” and a width of 1” I was ready to go in. The two largest issues that gave me pause were lower capacity and it did not have the reputation of a great trigger. Not bad by any means, just not great.

Unfortunately, I could not go into a gun shop and handle before I bought. There’s not much available considering the current paranoia; much less for concealable pistols in 9mm. So I waited, and waited, and waited. It took more than a couple of months but I finally scored a PPS M2 online and had it shipped to my FFL – all for $350, an excellent price considering the times.   

Shown with 7 round magazine.

My particular pistol shipped with two 7 round magazines and one 6 round magazine. The pistol feeds from single stack magazines so each additional rounds adds a noticeable amount of length to the grip. My M2 version sports the American-style push button magazine release, no removable back strap inserts, and a trigger safety found on a lot of striker fired polymer pistols without manual safeties. Missing from the M2 is the accessory rail, Walther opting for a scalloped frame forward of the trigger guard to slim the profile.

A polished feed ramp comes standard.

The slide is steel treated with tenifer. A black oxide coating covers the exterior and interior. The serial, country of manufacturer, and year of manufacturer are stamped on the right side of the frame. DE stands for Deutschland (Germany) and the CA prefix.

indicates my pistol was made in 2020. Slide serrations cover the front and rear of the slide. Sights are steel with 3-dot white painted inserts that are not luminescent.

The finish is nicely done.

When examining the slide the first item of immediate notice was the finish and machining. The black oxide coating is very smooth and even. The machining is exact. The interior of the slide is perfectly smooth and free from any marks that don’t need to be there. Another thing that struck me about the machining is the fine details on the exterior of the slide. The edges aft of the rear sights are not rounded, but faceted. It looks like a lot of work went into taking off unnecessary edges and it shows (or doesn’t in this case) when carrying concealed.

Considering the other options I really took a gamble on the trigger. Walther advertises it at 6 pounds so I figured a bit more than the Glock standard of 5.5 pounds, plus a few more ounces of felt pull due to the smaller size. What I feel when I depress the trigger is not much over a standard Glock trigger. On top of that, it’s the same weight all the way to the break. And upon arriving at the break there is no stacking or increased resistance. The PPS trigger is a solid pull with a clean break. I would describe the trigger reset as longer than my Glock 30 but only just so.

Shooting the PPS M2 is a lot like any other single stack polymer frame 9mm. There’s not anything especially noteworthy. I like it a lot better than the Glock 43 I reviewed a few years ago. The added mass in the PPS recoils less and I would expect it to be softer shooting than the lighter Sig 365 and similar models. Overall weight was a consideration and a heavier pistol will generally shoot softer. From the reviews I’ve read on this pistol from others it seems the 7 round magazine is the preferred method of carry. While I feel the 7 rounder gives the best combination of balance and shootability, it didn’t meet my requirements for concealment with summer attire. I found the 6 round magazine to give up little in terms of control and with a little practice, it was no problem to curl my pinky finger under the base of the magazine when shooting. This type of grip worked for shooting my Uberti 1873 SAA clone and it works for the Walther.

Grips are rounded and have adequate texturing.
The slide interior showed a lack of tooling marks.

I’ve put a couple hundred rounds through the pistol so far and have experienced only one ammunition-related failure to chamber. Once I have some more time with the pistol a follow up review will be forthcoming.

260 Rem With Cast Bullets Part 2

Reviews, Tips

In the initial review of using cast bullets in the 260 Rem I discussed barrel cleaning and stressed the importance of removing copper prior to shooting cast. I also touched on some of the problems encountered during reloading and shooting, and mentioned bullet deformities and their effect downrange. If you have stumbled upon this article and want a comprehensive guide to the subject of shooting cast bullets in modern cartridges, I suggest you start with the previous post here.

In part two of this review I wanted to cover the bullets themselves. Most notably – lubrication and alternative coatings. There have been some advances with coatings for cast bullets over the past 10 or so years that have negated the need for traditional bullet lubes. For whatever reason, mention of these coatings does not appear in any of the reloading manuals I own.

I had success with electro static powder coating for 9mm so naturally I tried it with the RCBS 6.5-140 SIHL bullets. The process for powder coating is fairly straightforward but it would aid the reader to view many of the videos posted on sites like youtube to get a better understanding of the process. In any event I’ll try to offer my way.

Powder coated with Eastwood Light Violet

Since electro static powder coating involves using static to coat the bullets, one must take care during the casting procedure as to not let the oils from your fingers make contact with the bullets. The use of leather or nitrile gloves during the inspection process is recommended to avoid oils or other contaminants from collecting on the surface of the lead. A plastic sandwich bag can be used in a pinch as a makeshift glove for this purpose. If you inadvertently touch the bullets, they will need to be tumbled with an amount of rubbing alcohol or similar solution and dried before powder coating.

After inspection, the bullets will need to be warmed in order to take the powder coating more easily. This is accomplished in a toaster oven for four minutes. For my particular model I turn the knob to “bake” and “warm.” After the bullets have come out of the oven I place them into an old plastic container with a lid that once housed yogurt. Any similar plastic container will do. The next thing I do is add in a small amount of powder. Start with a small amount, maybe three tablespoons for 50 bullets. Too much will result in clumps. I then seal with the plastic top and swirl the bullets vigorously for about 30-45 seconds. The bullets are then strained on a piece of metal gutter guard cut to fit the toaster oven. Give it a few shakes to dislodge excessive powder which will cause the bullets to glue together if not removed. You may have bullets which are touching in your tray. This is not a great concern and they can be pulled apart after baking without a detrimental effect to the coating. After straining, the bullets are loaded into the oven which is set at “bake” and “400 degrees.” I set the timer for 20 minutes and pull them out once done. After about 15 seconds I flip the tray and tap the bullets out with the back of a spoon. Again, some bullets may stick together. They can be unstuck with a twisting motion or simply plopped on a hard surface like concrete. You may notice that the coating has rubbed off in places where the bullets stuck together or the coating did not adhere completely. In my experience this has not resulted in problems with leading unless the coating was substantially lacking.  

The next step in the process involves attaching gas checks and sizing. I tried shooting powder coated bullets without gas checks and the accuracy was disastrous. It’s worth comparing checked versus unchecked since each gas check runs around three cents these days. I didn’t work for me but that shouldn’t stop you from experimenting.

I noticed with powder coated bullets the gas check bullet shank was a tad thicker with the coating and it helped to manually slip on each check before sizing to keep them from seating off kilter. You then run each bullet through a sizing die which sizes the bullet and crimps on the gas check. Through experimentation, I found that my rifle prefers bullets sized to .265”.

I mixed two Eastwood powders, Light Violet and Neon Green. The color is splotchy but the coverage is fine.

Jumping ahead, I have found no benefit to powder coating for 260 Rem thus far. Groups even suffered under some loads of Unique and A5744. As such, I’ve suspended powder coating for this rifle as it takes more time and costs slightly more. I may take it back up in the future but traditionally lubed bullets fill my needs for now. With that said, part three will cover traditional lubing of cast bullets.

260 Rem With Cast Bullets

Reviews, Tips

Back in August, 2016 I concluded my multi-part review of the Savage TH XP with a note about cast bullet loads in the 260 and a review to follow https://landngroove.wordpress.com/2016/08/29/savage-trophy-hunter-xp-in-260-rem-conclusion/. Little did I know how difficult the process would be or how long it would take to iron out all the details. It took me four years (off and on) to get cast bullets shooting accurately. I made multiple attempts, failed several times. At one point I had written off the project but kept coming back with new ideas. Casting for handguns is one thing, casting for 19th century black powder rifle cartridges another, but for modern smokeless rifle rounds? It will take everything you know about shooting, ammo, reloading, casting, and then add new challenges.

Some reloaders and those who cast for pistols may ask, why even bother? If you have to ask its probably not for you. But if the proposition of such constantly eats at your mind, or if like me, you’ve failed to achieve ballistic harmony with cast in rifles – read on.

So picking up where I last left off, I had been loading cast projectiles in the 260 prior to posting that previously mentioned conclusion. One of the things I had failed to do was properly de-copper my barrel. According to my records there were approximately 1,900 jacketed loads through the rifle by fall 2016. I always cleaned it but never to the degree I should have. And I previously posted that the 12 bhn bullets I was using were too soft. I know now that is incorrect. The hardness of the alloy wasn’t the issue. But back to the bore. To be up front, I figured out all of the problems and had working ammo prior to de-coppering my bore. The issue was the accuracy was not all it could be. So for the aspiring cast rifle shooter I recommend removing all copper from your bore before developing loads. That way you remove one possibility for poor performance later on.

It can take a while with marginal copper solvents but starting with a clean bore is well worth the wait.

There are specially designed bore cleaning products for this job but if you have regular old Hoppes 9 and a lot of time that works too. It took me about a week of running a soaked patch through the barrel when I got home from work, followed by a dry patch to remove copper several hours later. I would then run another soaked patch before bed, let it sit overnight, then dry patch again first thing in the morning. I stopped when the patches stopped coming out green.    

Next, you will need cast bullets. The mold I had been working with was the RCBS 6.5-140 SILH which drops a bullet at approximately 140 grains. The alloy I use is composed of three parts range scrap to one part linotype. The resulting Brinell hardness number (BHN) is approximately 12.4. I use the same custom alloy for 357 magnum and 480 Ruger loads. After casting is complete you will want to inspect your bullets for defects. And here is another step that I did not complete with enough scrutiny during my previous efforts. To shoot a cast pistol bullet with a minor defect such as wrinkling or a minor divot isn’t a big deal. The velocity and range of pistol loads will not allow those defects to effect the point of impact within reason. But up the velocity and go much past 50 yards and that small imperfection begins to have a bearing on the center of rotation. That leads to destabilization in flight. You need to be looking for sharp bullet bases, filled out edges, and imperfections like wrinkles. Pay close attention to ensure proper fill out of all parts of the bullet. If you’re on the fence, toss it back in the casting pot. You can always recast later.

Small imperfections can contribute to large groups down range.

That concludes this part of the review. I intend for this to be a multi-series examination of the process and hope to offer a specialized look at 6.5mm cast bullets in particular. There’s not a whole lot out there for aspiring cast rifle shooters who shoot modern 6.5mm cartridges (like 6.5 Creedmoor shooters) so I wanted to put this out there as a resource. I’ll be sure to cover all the mistakes I’ve made along the way and some of the load data I’ve developed. Part two next.

Ruger Super Blackhawk in 480 Ruger

Reviews

This story starts in early 2014. At the time I was still a neophyte around firearms.  As a new carrier of a S&W 642 snub nose my interest in revolvers was piqued. Somehow I got it in my head that the pinnacle of wheel gun satisfaction would be found in a S&W model 14. Six inches of blued steel in front of a six shot 38 spl cylinder. Red ramp front on top backed up with an adjustable rear sight. And wood grips to boot. What could be better? During that time Smith & Wesson was offering the model 14 as a part of their classic line, in blued and nickel. But the price was steep for a relatively new worker in my late 20’s, $949 as I recall. No matter how much I saved it would take me quite a while to foot the bill, and I still had an AR-15 for which I was saving.

So I saved. And then I saved some more. While doing so the model 14 ceased production. There were still used models on gunbroker.com but I wanted brand new and had yet discovered the potential joy of a pre-owned, and well taken care of wheel gun. No matter, I thought, I’ll compromise and save a few bucks in the process. And so it was a few days before my birthday in 2014 I took delivery of a S&W 686-6. Six inch barrel with full underlug, stainless steel, 357 magnum, red ramp front sight with fully adjustable rear sight. It didn’t take me long to start reloading for it and then I discovered the potential of the 357 Magnum. With this revolver I could load hollow base wadcutters to full bore 180 grain semi-wadcutters. I enjoyed this revolver so much I quietly forgot about the model 14. But as with most things I soon reached the maximum allowable cartridge loading for the 357. To add to that, my preferred hot load used Hodgdon Lil Gun powder, which has a reputation for eroding forcing cones. Sure enough, it wasn’t long before I discovered the tell-tale erosion on my forcing cone. Now I haven’t stopped shooting full bore 357’s through my 686, but I have cut back a bit. What I needed was a new cartridge and subsequently new gun.

As a reloader of 32-20 I gave serious consideration to a 327 Federal. Around the same time I began experiencing with souped up 32-20 loads in my Uberti SAA Cattleman and figured I wouldn’t gain much in terms of potential over the 32-20 and so abandoned the idea. Ruger’s reputation of offering Single Seven cylinder throats at .315+ didn’t help when my largest mold dropped .314 either. I also considered the S&W 57 Classic in 41 Magnum. I tend to gravitate towards niche cartridges but I eventually reasoned I would run into the same problems that I encountered when loading the 357. That left the 44 Magnum. I had a few range pick-up cases but nothing to give an advantage over anything else. I looked at the specs and wondered about a S&W 629, 4″ barrel, stainless. Would it satisfy my desire for power and not wear down in the process?

IMG_2113

To keep this from getting too long I decided to skip the 44. I chose a 480 Ruger instead. But that’s a hunting round! Just like the 32 H&R is a defense round, right? It was marketed as a hunting round and based on the limited literature I’ve read it would appear to have struck the ten ring in that regard. But the 480 has something other cartridges in the same class seem to lack. For one, its a lower pressure cartridge. Its not a screaming 454 Casull, but it has the potential to throw much larger bullets. Considering my experience with large diameter and heavy bullets, all in a low pressure cartridge – think 45 auto – I reasoned it would do well with cast bullets.

I rolled the dice on a Ruger Super Blackhawk, 4 and 5/8ths barrel, in 480 around July 2019. Along with that was a purchase for dies, brass, and a mold. I wanted to have access to widely available load data so chose the Accurate 48-325P in 325 grains as my first choice. I ordered it to drop .479” with range scrap, expecting the Ruger chamber mouths to be a tad large.

Upon taking delivery of the Ruger I immediately noticed how well the revolver balanced in the hand. I had never handled a single action with a barrel of less than 5.5”, so was pleasantly surprised in that regard. Upon cocking the hammer the first time I noticed it had a tendency to hang up halfway back. Fortunately, this smoothed out after 100 or so pulls but it gave me pause before signing the paperwork.

IMG_2298 IMG_2391

As one who was not used to heavy recoiling hand cannons my first task was assembling rounds that would give me trigger time but not entreat my hand to a flinch. I settled on 11.4 gr. of Unique as a general purpose blasting load. All bullets were sized to .476.” The shot on that first round was a bit of a surprise. Not awful, but a lot more recoil than I was expecting. The chronograph put this load at 1,020 fps. Later on, I moved to loading the 325 grain bullets with Alliant’s 2400. My current load is 20.0 grains for an average velocity of 1,073 fps. These offer slightly more recoil and muzzle flash but group more true to the sights.

I did encounter a problem on the first range trip. The revolver shot a good 5-6” low at 12 yards. Most of the holes were touching but way off the bullseye. Adjusting the sight took half that amount off. And then I realized I was flinching. A few hundred rounds later and it shoots point on aim. And that brings me to a caveat with this gun. If you’re not used to large bore handguns, expect to put in some range time to bring yourself up to speed.

Another problem worth mentioning was the barrel leading. If there’s one thing this revolver doesn’t like, its .476” bullets. And that goes for .477” too. I had to use a dowel wrapped in sandpaper to achieve .4775” – .478” until the gun stopped leading. I would have bought a .478 sizer if one was for sale but had to fashion my own. Your experiences with the same type of gun may differ.

So what about the good things and features? For one, the Super Blackhawk is beefy. Not just the frame, but the barrel, grip, and cylinder are all massive. That’s not to say you couldn’t carry this revolver around all day in the wilderness – I would. But a K frame it is not. Ruger also put some nice touches on this revolver.

IMG_2364

The cylinder features counter sunk chambers, which allow the cartridges to be fully enveloped by the chamber. Being a 5-shot, the cylinder notches are offset from the chambers, allowing a generous amount of steel between rounds. The cylinder bushing is permanently mounted.

IMG_2394 IMG_2395 IMG_2362

The Bisley style hammer has ample serrations for a good purchase without being too sharp. The grips, while not perfectly fit, feel great for my medium sized hands and look presentable with the Ruger logo medallions. The rear sight is fully click adjustable for windage and elevation, and maintains a classic square notch. The front sight is a serrated blade in flat black, pinned to the top barrel rib. I don’t have the means to properly measure trigger pull so this is all subjective, but the break is crisp. There’s a hint of take up which contributed to a learning curve on those first outings but its doable. To help mitigate the effects of recoil, the cylinder pin features a slotted screw to keep it from flying out while shooting. It is not necessary to completely remove the screw for field stripping.

IMG_2381

After 90 rounds but prior to any cleaning. This particular revolver prefers .4775 – .478″ bullets.

I still have some more testing to do but in the 515 rounds I’ve loaded and fired so far, I think this one will be a winner. Don’t be scared to explore expensive, and lesser known cartridges that do not enjoy widespread factory ammunition choices. If you want to get into big bores for nothing more than Sunday afternoon plinking, give the Ruger Super Blackhawk Bisley in 480 a look. While it takes some initial investment in casting supplies if you don’t already pour your own, the reward is worth the effort. And if you already cast bullets you are well on your way. Unlike some of the more well known large bore cartridges like 44 Magnum, I do not think I will outgrow this round. The 480 can be loaded mild to wild to suit the needs of each shooter’s skill and recoil tolerance. What it lacks in low factory ammunition cost, it makes up for in versatility.

Lyman 311008 or How I Almost Quit Bullet Casting Before Getting Started

Reviews, Tips

My introduction to bullet casting began with the need for a particular bullet comprised of a specific alloy. I had begun loading 32-20 with black powder to shoot out of my Uberti SAA clone (review here). Before jumping in with both feet I purchased bullets cast in the Lyman mold, 311008, by a reputable company. The particular samples purchased were relatively soft, around 8 Bhn, and lubed with SPG, a common black powder compatible lubricant. The bullets arrived pre-sized to .313″ which is what I needed at the time. While they worked great they were prohibitively expensive.

My best option was to purchase the mold and make my own bullets with the alloy I could scrounge at my local range. Now, a bit of education for the novice: Generally speaking, Lyman bullet molds list the nominal bullet diameter in the preface of the numerical indicator. So a 311xxx will cast no larger than .311″. To top it off Lyman recommends the use of their #2 alloy for all casting. For those not in the know #2 alloy is quite a bit harder than the softer alloys typically encountered with black powder shooting. Think Bhn 15 or thereabouts. Bhn 15 is double the hardness that I would need. And seeing as how this particular mold was designed for a cartridge introduced in 1882 it seems likely that it would probably obtain the nominal diameters without the need for harder lead alloys.

And that’s where I made one of many first mistakes in bullet casting. After acquiring a suitable bottom-pour casting furnace I bought the Lyman 311008 and handles for around $140 all together. That’s not including the equipment to size and lube the bullets but I will not go into those expenses for this review. I then collected a small assortment of fired bullets and fragments of those bullets known colloquially as range scrap. I melted them down into ingots to remove impurities and then cast bullets from the ingots with my new mold.

IMG_2229

So what was the result? A bullet that never reached more than .310″ of course. Range scrap has a Bhn of around 9-10 give or take. That’s quite at bit less than the recommended #2 hardness. But the store bought bullets? Yeah, it makes no sense. They must have had a modified mold or an older mold which are known the cast larger diameters. I tried casting barely hot, hotter, and frosted bullet hot. It didn’t matter. They all came out undersized. I lubed and loaded them up anyways. Accuracy wasn’t abysmal but it wasn’t as great as the store bought fodder either.

To keep this from getting too long I solved the problem by buying a different mold, the RCBS 32-098-SWC. It casts a beautiful bullet more akin to a round nose flatpoint than a true semi-wadcutter. It also casts a nominal diameter of .313″ with any alloy. And coming in at 100 grains as opposed to the 115 grains of the Lyman, it was easy to find suitable load data in that particular bullet weight range.

As to the Lyman 311008 – I still have the mold. After a few years of casting I tried it with a custom alloy consisting of one part Linotype to three parts of range scrap. It gives an approximate hardness of Bhn 11.4, still a bit less than the #2 alloy but it drops from the mold at .312″ so I’ll take what I can get. I currently use the bullet for high velocity smokeless loads in my SAA clone. The one saving grace for this mold is that it produces accurate bullets when cast with harder alloys.

IMG_2233

Lyman 311008 bullets cast of 1:3 Lino to Range Scrap produced an acceptable bullet for high velocity smokeless loads.

IMG_2236

Moral of the story: Don’t let your initial bullet casting experiences sway you from pursuing a time honored and truly enjoyable side hobby. I almost wrote off bullet casting for good if not for other mold manufacturers. And there are much better molds than Lyman. While they still catalog some classic designs there are much better molds out there for the beginning caster. I’ve used RCBS, Lee, and Accurate with RCBS comprising the majority of my collection. If you want to start casting bullets maybe don’t start with Lyman molds. They’re not cheap and from what I’ve learned from other reviews their problems with casting undersized bullets has not been limited to my experiences. If anything I hope my fourteen nickels worth of free advice has been useful.

38 spl Multi Ball

Loads

As an intermittent departure from my regular gun reviews, I wanted to begin writing about loads. Of all the cartridges than can be reloaded, those for revolvers are naturally adept at accepting the widest range of bullet profiles. From round nose to wadcutter and everything in between, reloaders of revolvers need not be concerned with feeding for reliable function.


As it were one afternoon, I began thinking about new loads for 38 special. I had read an article several years back in a magazine detailing how the author used several roundballs to construct multi ball loads for 38 and 357 magnum cartridges. Already a caster for cap and ball and 38 spl, I already had the necessary tools and components to give it a go.

lee rb mold


A Lee 375 roundball mold, used for my Uberti 1861 Navy, was put to use casting .375” balls of range scrap alloy. I sized the approximate 80 grain balls in my .358” sizing die mounted on the RCBS lubamatic. A flat top punch was used so as not to deform the rather soft projectiles. I was initially concerned about the balls entering the sizing die slightly offset, but this did not affect accuracy.

sizing

After the balls are sized, the underside has a pronounced flat area while the top has an identical although smaller flat area. Using bullet lubricant formed into pea sized amounts, I was able to connect two balls to form one bullet, essentially a 160 grain round nose flat point. The idea is to keep the two balls relatively centered while loading. The lube also acts like it would with a solid bullet, reducing leading and keeping the barrel clean.

2ball

I settled on Unique powder for the propellant since data is widely available for 38 special in the 158 – 160 grain range. 3.6 grains with the two balls seated to an overall cartridge length of 1.312” gave a velocity of 690 fps from the 1.875” S&W 642. The resultant accuracy at 10 yards is about 1”. I also tested, but didn’t chronograph, the rounds through a S&W 686, 6” with the same accuracy at 20 yards.

target1

Group from S&W 642 at 10 yards

The usefulness of this load is no doubt limited. Given the accuracy potential in a longer barreled gun it may have merit as a pest control load for rodents and the like. Or if you just like putting multiple holes in a target with half the trigger pulls, it does that pretty well too.

end

Bersa Thunder 32

Reviews

pistol left

When it comes to automatic pistols the potential buyer faces an endless array of options. The selection for target pistols is likewise vast. So one might think you can have just about anything you want for the right price. No? Well, almost. As long as it’s a popular design in the most common cartridges. More fittingly, the most popular cartridges. Then it was no surprise that I had quite the trouble finding a target pistol in 32 auto. They’re out there alright but in an age of polymer framed 9mm, 40, and 45 autoloaders there’s not a whole lot of room in the marketplace for the diminutive 32 or 380 for that matter.

But like most shoppers searching for that perfect item or at least one that will satisfy the purpose, one occasionally lucks out. Now I’m aware of the Beretta 81 and its more recent variation, the 81FS but none were to be found within budget during my search. Mid-sized pistols in my desired cartridge graced the online listings but none were found locally. None that could be inspected by hand, checked for function, and serviceability. As it were during one of my weekends perusing of the local pawn shop I spotted a peculiar pistol. I immediately realized it as a Bersa although figured it was chambered in the common 380 auto. Surprisingly it wasn’t. Also, surprisingly was the price. $249 for a used Bersa Thunder in 32 auto, a cartridge since abandoned by Bersa and Walther among others, was a steal. There were some faint scratches in the black oxide coating on the slide but everything else checked out. Front sight post with white dot, drift adjustable rear sight with two dot notch. And a double action / single action trigger pull that was definitely acceptable for the price range. Heck, even the top strap of the slide was textured for anti-glare effect.

mag extend

Included with the Bersa was one ten round single stack magazine. And the magazine, dear reader, is an abomination. I’m not talking about function as the pistol runs great. Durability is no question as the body is made of steel and blued. But what I cannot figure out is how the engineers at Bersa came to the conclusion that a sub compact pistol in 32 auto needed a magazine extension to allow a full grip on the pistol. I could give some credit if that extension afforded additional rounds but no joy. This thing, this horn protrudes a solid inch from the bottom of the frame. After some fiddling around with different holsters I came to the realization that the height from the top of the slide to the bottom of the magazine extension precluded any effective concealment with all but roomy flannel shirts and a jacket for layering. No problem, I’ll just file off the bottom. The problem? The magazine spring extends into the recess of the hollow extension. Long story short I supplemented a Kel-Tec P32 magazine base plate with the original spring and it works, albeit with only eight rounds. It took some relieving of the Kel-Tec part but it slides in snuggly without too much trouble. There is, however, a small gap at the base of the magazine but I’ve yet to have a problem with the pistol due to this modification.

keltec base plate

So it’s not perfect. For concealment anyways. But in single action, this pistol shoots. And recoil, oh the recoil. What is that anyways? The Bersa sports a blow back action and takes many design cues from the Walther PP. Under the hood you will find a barrel attached to the frame. The leading edge of the chamber is beveled in line with an inserted magazine for ease of feeding. The recoil spring fits over the barrel and rests against the inside of the slide. Field stripping the Bersa is just like the Walther. After ensuring the magazine is removed and the chamber empty, pivot the takedown lever on the right side of the frame located forward of the slide stop. While holding the lever in the down position, retract the slide until it becomes available to lift it from the frame. Once accomplished, let recoil spring tension ease the slide forward until it separates from the frame. The recoil spring just slides off the barrel for easy cleaning. To reassemble, I would say reverse the procedure but the Bersa can be sort of finicky in that regard. Seating the slide back on the frame will take some getting used to but does not require much practice. It is a task best left to feel and will come naturally with practice.

field strip2

Now to the features. My particular model contains a magazine safety, meaning the trigger will not actuate the double action or single action sear without the magazine in place. The plastic grip panels are held in place with a single screw and will need to be removed to disengage the magazine safety, a simple ten minute task. I decided to leave mine in as the intention is recreation and the safety does not noticeably interfere with trigger pull weight. Other exterior controls are the slide stop lever and magazine release. The slide stop operated smoothly with no hang ups and is easily accessible. Same for the magazine release. One thing I found unusual for a pistol in this price range was the grooved trigger and grooves on the front of the grip below the trigger guard. For its intended purpose as a defensive pistol, Bersa put out an attractive package for the sub-$400 market.

handloads

Bullets cast with RCBS 32-77-RN and sized to .312″

For ammo I used every kind of factory offering available. The Bersa does fine with FMJ and hollow points alike. I had some difficulty with a couple reloads but that was not the fault of the gun. I found that if the ammunition functioned in the Colt 1903 it worked equally well in the Bersa. Over the years I settled on a standard 32 auto load consisting of an RCBS 32-77-RN cast of range scrap over 2.2 gr. of W231 powder, primed with a CCI 500 small pistol primer. Most of my cases have been European and Central American origin with the bulk being Fiocchi and then Aguila.

Out at the range the Bersa did ok. During my last outing I experienced a stove pipe and some magazine spring issues. Rest assured it was only my reloads. 32 auto is not a overly challenging cartridge to load but with small cases and stubby bullets it is easier to seat a bullet slightly off center. With factory ammunition the pistol runs flawlessly. My recent target practice with the pistol left some things to be desired. While the trigger is nice for what it is, there is a noticable spongy feeling prior to the break. The Bersa is not a pistol I frequently shoot so the initial groups show that. The grip provides ample real estate for a steady hold but those with larger hands may need to adjust grip to provide correct trigger finger placement. For almost every pistol I own, the proper placement of the trigger finger would be the pad of the index finger on square on the rigger. For the Bersa, I couldn’t obtain the best groups with that technique. I found that using the first distal joint, like how one would fire a revolver, proved the most controlling for precise shots.

average group

Not my best shooting but average for the day.

My initial groups are were shot from 12 yards using the pad of the finger. After adjusting to the first distal joint, groups tightened up to less than an inch. I managed to squeeze off a pair of shots touching at 10 yards.

As shooters of 32 auto pistols will attest, those wishing to reload the brass will spend some time finding it. Every pistol I’ve shot in the diminutive cartridge has a tendency to throw cases into another dimension. The Bersa is no different. A full 120 degrees encompassed my littered brass.

group 10 yards

Slightly better

While not the purpose built target pistol, the Bersa offers a decent platform for just such activities. While it lacks a dedicated target trigger and leaves some of the more desired features out like being able to raise or lower the rear sight. But for $250 on the used market and maybe 50 clams more for a new-in-box model, that ain’t too bad.